

Actuator Coupling 4LFV Creation: Difference between revisions
(Inserted image) |
mNo edit summary |
||
| Line 3: | Line 3: | ||
|about=Actuator_Coupling_4LFV | |about=Actuator_Coupling_4LFV | ||
|product=actuator+coupling+4LFV}} | |product=actuator+coupling+4LFV}} | ||
# [[File:Actuator coupling 4LFV 3d model.png|alt=3d model of a actuator coupling 4LFV.|thumb|3d model of a actuator coupling 4LFV.]] | # Cut blanks on table saw to 1.7 inch. [[File:Actuator coupling 4LFV 3d model.png|alt=3d model of a actuator coupling 4LFV.|thumb|3d model of a actuator coupling 4LFV.]] | ||
# Follow the steps inside of the coupling instructions. | # Follow the steps inside of the coupling instructions. | ||
# Use the coupling drill fixture 0.75 (TL-CDF750) in the mill to drill a cross hole. | # Use the coupling drill fixture 0.75 (TL-CDF750) in the mill to drill a cross hole. | ||
Revision as of 16:47, 25 February 2024
- Cut blanks on table saw to 1.7 inch.
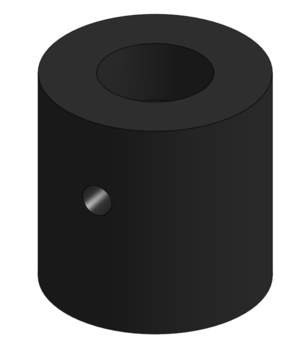
3d model of a actuator coupling 4LFV. - Follow the steps inside of the coupling instructions.
- Use the coupling drill fixture 0.75 (TL-CDF750) in the mill to drill a cross hole.
- .285 inch from the top face create a .107 inch hole that goes all the way to the center of the previous hole.
- Use 6-32 x 1/4 tap to thread the hole.
- Insert screw 6-32 x 1/4 SS SS (92311A144)
